This article is intended for FACULTY and STAFF only.
What is Company Portal for Mac?
- Provides access to Application downloads, Make Me Admin, network drive mounting, Helpful Links, and more
- Available to all University-owned macOS devices on campus (Faculty, Staff, Classroom, and Labs)
- Cedarville-branded Self-Service application by Jamf
How Do I Use Company Portal for Mac?
There are multiple ways to get to Company Portal for Mac. Below are a few options to get started.
Option 1 - To Open Company Portal with Spotlight Search:
- Click
 in the upper-right corner of the menu bar, or press [Command] + [Space bar].
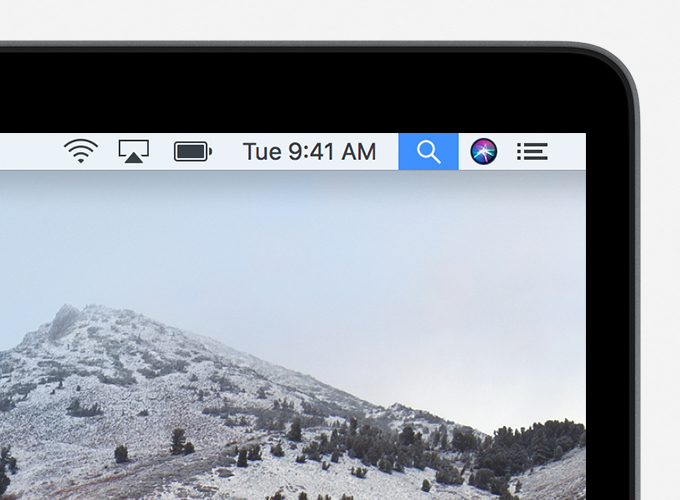
- Search for “cedarnet” and allow auto-fill to finish the phrase.
- From the results list, double-click "Company Portal" to open.

Option 2 - To Open Company Portal with the Finder:
- Click the Finder icon
 in the Dock.
- Click "Applications" in the upper-left sidebar.

- Double-click the "Cc" icon to open.

Option 3 - To Open Company Portal with Launchpad:
- Click the Launchpad icon
 in the Dock (or use the Control Strip).
- Click the "Ccompany Portal" app icon.

Unable to locate Company Portal with any of the above options? Please submit a
ServeCU request under the appropriate category:
How Do I Keep Company Portal at the Bottom of my Screen?
After opening Company Portal using the above methods, the app icon appears in the "recently used" section of the Dock, indicated by the vertical gray lines. 
To Add Company Portal to the Dock:
- Click the "Company Portal" app icon.
- Drag the icon between any two apps already saved in the Dock.
- Release when you are pleased with the new location.

In this example, "Company Portal" was moved in between "System Preferences" and "Bomgar," but you can choose anywhere to the left of the gray line.

Company Portal will remain in the Dock, even after closing open windows or quitting the application entirely.
Additional Resources